Parameterization of the LoRa transmitter
published: 30 September 2020 / updated 8 October 2020

You have just received your LoRa modules. There is no question of using them as they are. Before connect them to an Arduino board, you have to configure these modules.
Serial link connection
To configure a LoRa module, you must:
- a PC with a terminal program. Tera Term will do;
- a serial link between your PC and the LoRa module. Most laptops no longer having a serial port, you will need a USB-RS232 adapter;
This video shows how to use a terminal program and a USB-RS232 link.
CAUTION: the LoRa module must be supplied with 3.3 volts!
Essential parameters
Here is the list of essential parameters to configure your LoRa module.
Serial transmission speed
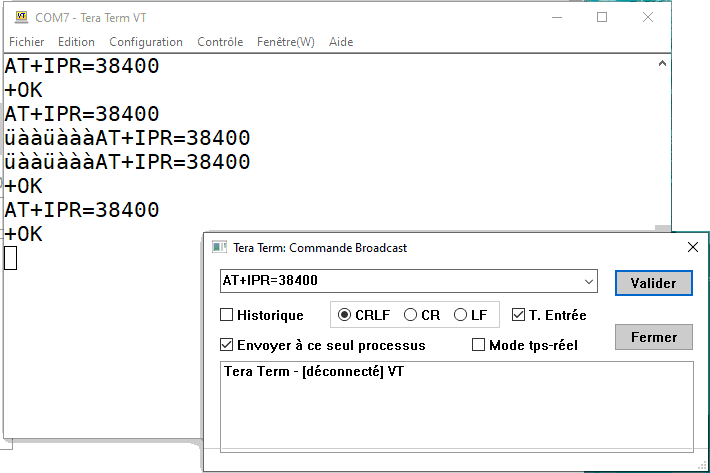
By default, the LoRa module communicates at 115200 bps.
In order to facilitate communication between the FORTH language installed on the ARDUINO card and the LoRa transmitter, the transmission speed must be brought back to 38400 bps
The transmission speed is set with the command AT+IPR :
Fréquence
The frequency must be set with the command AT+BAND :
AT+BAND=868500000
Sets the LoRa module for transmission on the 868.5 Mhz frequency.
The frequency is indicated on 9 digits, without separator or space. The unit is Hz.
The REYAX RYLR896 LoRa module can operate frequencies from 862 Mhz to 1020 Mhz.
ATTENTION: the antenna must be tuned to the frequency used! The antenna fitted to the LoRa REYAX module is tuned for frequencies around 868 Mhz. Using a poorly tuned antenna will dramatically decrease efficiency of the LoRa module in transmission.
LoRa modules transmit in narrow band. Choose any frequency among the frequencies authorized in your country.
Transmit power
The transmit power of a LoRa module is determined by the command AT+CRFOP :
AT+CRFOP=10
Sets the transmit power to 10 dBm. The default power is 15 dBm.
The parameter is located in the range 0..15, 0 being the lowest transmission power and corresponds to a transmission power of 1 mW
The power should be adjusted according to the distance between the LoRa modules, interference possible. Too much power over a short distance can affect the quality of the transmission.
LoRa Address
In order to communicate with a specific LoRa module, it must be assigned an address with the command AT+ADDRESS :
AT+ADDRESS=155
Assigns address 155 to the LoRa module.
Several LoRa modules can share the same frequency, but each LoRa module has a different address.
Addresses are given in decimal format in the range 0..65535. The addresses 0 and 65535 are reserved for global use. If a message is tramsis at address 0 or 65535, all LoRa modules listening to this frequency will take into account this message.
Example:
- programming of 3 Lora modules with the addresses: 120, 150 and 180
- the message AT+SEND=120,5,HELLO will be received and processed by the single address module 120;
- the message AT+SEND=125,5,HELLO will not be processed by any module, because there is no module with this address;
- the message AT+SEND=150,5,HELLO will be received and processed by the single module with address 150;
- the message AT+SEND=0,5,HELLO will be received and processed by all LoRa modules;
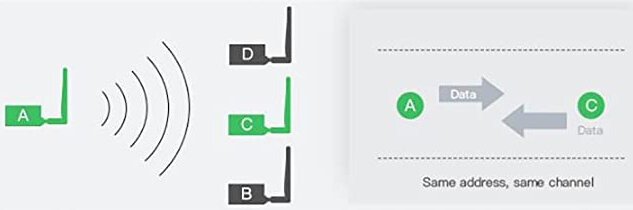
In this diagram, the transmitter module must also have a specific address.
In point-to-point communication, in the case of our diagram, a receiver module can become transmitter and contact any other loRa module.
Network ID
In a heavily congested radio environment, a group of LoRa modules can be isolated by assigning them a network identifier with the command AT+NETWORKID :
AT+NETWORKID=5
Assigns network identifier 5 to the LoRa module. By default, this is the identifier 0.
The possible identifiers are in the range 0..16.
Sécurité
With the parameters mentioned above, there is no confidentiality of LoRa transmissions.
The AT+CPIN parameter is used to define an AES encryption key of 32 characters:
AT+CPIN=FABC0002EEDCAA90FABC0002EEDCAA90
Installs 32 character string AES encryption. This key must be the same on the transmitter and receiver modules.
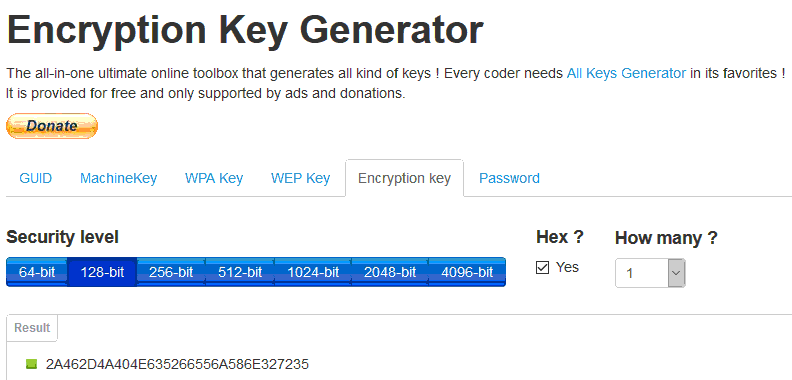
Site to generate an AES key:
Site pour générer une clé AES: Encryption Key Generator
- select "Security level": 128 bit
- click "Get New Result"
All LoRa modules on the same network must share the same AES encryption key.
If a LoRa module receives an encrypted message with the wrong key, it will ignore this message.
Thus, two LoRa modules from a different network, with the same address, on the same frequency, but with a different encryption key will only take into account the messages that are addressed with the appropriate AES key.